I've had several people ask me recently for tips on how to get the right exposure, and because it's a pretty in depth subject, I haven't been able to give them all the information they've needed in just the few minutes we have had to chat. This post is going to endeavor to explain the basics, and some advanced things, hopefully making this subject a little more clear for you. Like my composition post, this one will be broken up into different parts, so be sure to make sure you read all of them.
"Soapbox please!" Some of you may read this post thinking to yourself, "why all the fuss about exposure? Can't I just fix my exposure in Photoshop?" The answer to that question is......not always. I'll cover why later, but let me say this: Your pictures WILL look better if you get the exposure right when you first take the picture. Trust me on this. I'll get off my soapbox now.
The word "photograph" comes from the Greek words "phos", meaning "light", and "graph" meaning "to draw", so a photograph, by definition, is a drawing made from light. Exposure gets it's name because it refers to how the digital sensor, or film, is exposed to the light coming through the lens (I'll refer to digital sensors, since I shoot digital, and I think probably all people reading this shoot digital as well. If you do shoot film, why? J/K, the same principles apply to film). If the sensor doesn't record enough light for the desired result, we refer to this as underexposure, and the picture will be too dark. Conversely, if the sensor records too much light, it's called overexposure, and will be too bright. Either result is undesired. So, how do you avoid these undesirables? Well, let's get started!
I'll explain how your camera figures out exposure, but keep in mind, your camera is a computer that doesn't know what you're really trying to take a picture of, so it won't always decide on an exposure that is suitable for the particular photograph you're trying to get.
There are three things that determine your exposure. There's the shutter speed, the aperture, and the ISO. There's a thousand different combinations of these three things, each will effect your picture differently.
So, shutter speed. What's it all about? The name is maybe a little deceiving. Perhaps it should be called shutter time? In fact, the mode to change the shutter speed on some cameras is actually referred to as "Time Value" (Tv) instead of "Shutter Priority" (S). Your shutter speed is the amount of time that your shutter stays open for, exposing the sensor to light. Shutter speed is measured in seconds, and fractions of seconds. Most Digital SLR's have a shutter speed ranging from 30 seconds (displayed as 30" on your camera) to 1/4000 of a second. Obviously, the longer you leave the shutter open for, the more light is coming in, and the brighter your picture will be, and vice versa. Kind of like a sunbather; the longer he stays out in the sun, the brighter the shade of red his skin will turn. Leave the shutter open too long, you've got yourself some good ol' fashioned, PeeWee Herman, overexposure. Not long enough, and you're picture will be too dark/underexposed.
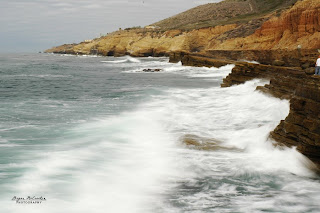
The other aspect of photography that shutter speed effects is motion. You know those pictures you're constantly getting of your kids playing around inside that always turn out blurry? It's because your shutter speed is too slow. The longer you leave your shutter open, the more motion your camera will pick up. And of course, there's the opposite end of the spectrum where the faster your shutter speed is, the more motion you will freeze. Sports photographers shoot at fast shutter speeds, landscape photographers taking those pictures of the fuzzy water shoot at slow shutter speeds. Here's a quick visual:
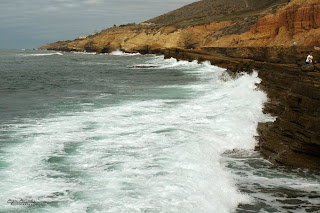
Waves moving at the same speed as above, but shot with a fast shutter speed.
Motion blur is always because of a shutter speed that is too slow, but the source of the actual motion causing the blur can be from one of two areas. Either your subject is moving too fast for your chosen shutter speed, or, your shutter speed is too slow and your camera is picking up on your hand and/or body movement. Even a movement as small as your heartbeat can cause blur (the only way to avoid this type of blur is to join the ranks of the undead and become a zombie. Easier said than done, I know, but it's always an option). To eliminate blur from a moving subject, try to keep that shutter speed above 1/125, generally speaking, and to keep your body from causing the blur, get a tripod. If that's not an option, the rule of thumb is to shoot at at least 1/60 of a second, or faster.
Since this post is about exposure and not capturing motion, I'll move on to talk about aperture quickly. Don't worry, I'll cover more about shutter speeds a little later in this post, and also posts to come.
Generally, the word aperture can be used to describe any hole or opening, and in photography, that definition holds true. Your aperture is the hole in your lens through which light passes. This hole changes in diameter depending on if you want a lot of light to come in at once, or if you want to restrict the light to just a little bit at a time. The best real world example is our pupils. They dilate and constrict, constantly adjusting to light changes happening all around us. Aperture is commonly referred to as "f-stops" in the realm of photography, and is measured in numbers like f/2.8, f/5.6, f/11, and so on.
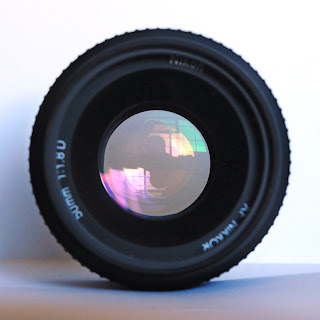
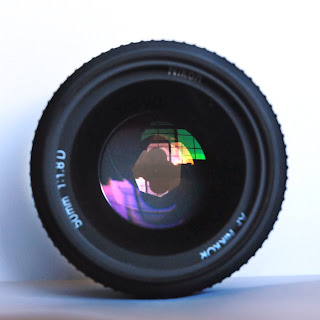
I think that aperture is probably the place where photography loses people because it's a little backwards. A small f-stop number like f/2.8 is actually a very large opening, whereas a large f-stop number like f/22 is a very small opening. Just remember, little number, big hole. Big number, little hole. Picture time!
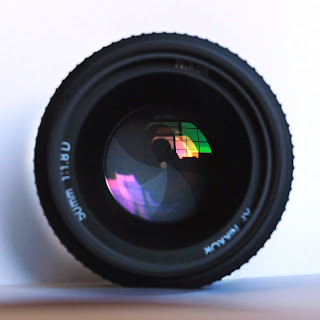
f/22-small hole
Generally, the word aperture can be used to describe any hole or opening, and in photography, that definition holds true. Your aperture is the hole in your lens through which light passes. This hole changes in diameter depending on if you want a lot of light to come in at once, or if you want to restrict the light to just a little bit at a time. The best real world example is our pupils. They dilate and constrict, constantly adjusting to light changes happening all around us. Aperture is commonly referred to as "f-stops" in the realm of photography, and is measured in numbers like f/2.8, f/5.6, f/11, and so on.
I think that aperture is probably the place where photography loses people because it's a little backwards. A small f-stop number like f/2.8 is actually a very large opening, whereas a large f-stop number like f/22 is a very small opening. Just remember, little number, big hole. Big number, little hole. Picture time!

f/22-small hole
Aperture also controls your Depth of Field (DOF-to be covered in a later post). For now, onto ISO!
ISO, for those geeks like me out there, stands for International Organization for Standardization. I know what you're thinking, and no, I'm not dyslexic. I know the acronym's letters don't match up, but that's really what it stands for! ISO refers to your film's or digital sensor's sensitivity to light. Your ISO is measured in numbers like 100, 200, 400, 1600, 3200 and so on and so forth. A low ISO number keeps the sensors sensitivity (redundant?) low, and boosting that number will boost the sensitivity. So, if your shooting in a low light situation, like at a wedding reception, or indoor sporting event, and your pictures are turning out way to dark, you could keep your shutter speed and aperture the same and simply increase your ISO, and the picture would turn out brighter and brighter as you continue to bump that number up.
ISO comes with one downfall though; grain! And we're not talking in terms of amber waves here people! Graininess from ISO shows up as tiny discolored speckles in your image. You'll see them in dark areas of your image first, and they can do a lot to ruin a good photograph, so be careful about your ISO levels.
Okay, enough jibber jabber, let's piece this all together. Here's a hypothetical situation. Let's say you're shooting pictures at your sons indoor basketball game. Playing a lot of basketball myself, I know that the lighting in gymnasiums may seem like plenty to our human eyes, but to a camera, that's a low light situation. You leave your camera to do the thinking, and you snap your first picture of your boy finishing off a fast break with a graceful layup. You're so proud of yourself for getting the timing just right, and you check out your camera's LCD to view your masterpiece, only to find that your boy looks like Dash from The Incredibles. Plus the picture is a little underexposed for your liking. Pickles! Your dreams of winning the blue ribbon at the County Fair have been dashed! So what do you do? Well, you know from reading your favorite photography blog, that you need to increase your shutter speed to stop the motion, so you do, and what do you get? Well, the action is frozen the way you want, but the picture is even darker? What the tarnation?! Oh yeah! Faster shutter speed, less light coming in, darker picture. Maybe you fool around with that aperture thingy and make the number smaller, and the opening bigger? You try it, snap another picture of that future All-American and.........better, but still too dark. Because you are a photographer with skills rivaling National Geographic status, you know you need to boost your ISO, so you keep your other setting the same; low aperture number, big opening, fast shutter speed, now a high ISO and YOWZA! Finally, there's the picture you want! The motion is stopped, the brightness is how you want it, there's a little bit of grain from the high ISO, but hey, better that than no picture at all, right?
I know this explanation is short, but I hope it helps. In future posts, which I'll try to have up faster than this one, I'll be going into these things more and more, so keep coming back.......please?! If you have any specific questions, you can always shoot me an email. Happy Holidays, and happy shooting!
